How to Configure Email Sending in Brixus365: A Step-by-Step Guide
A complete walkthrough of setting up your sending domain, DNS records, and verified sender addresses in Brixus365 -- with provider-specific guides and troubleshooting tips.
On this page · 9
Why Proper Email Setup Matters
Before you send your first campaign through Brixus365, there is a critical step that separates emails that land in the inbox from emails that land in spam: configuring your sending domain and sender addresses.
Skipping this step — or getting it wrong — means inbox providers like Gmail, Outlook, and Yahoo have no way to verify that your emails are legitimate. The result? Your carefully crafted campaigns get flagged, quarantined, or silently dropped.
The good news: Brixus365 makes this process straightforward. The platform generates every DNS record you need, gives you copy-to-clipboard buttons, and verifies everything with a single click. This guide walks you through every step, with visuals.
Email Setup at a Glance
Six steps from zero to sending — most take under a minute
Add Your Domain
Enter your sending domain in Email Setup
Configure DNS
Add SPF, DKIM, and DMARC records at your registrar
Verify Domain
Click "Verify Domain" — Brixus checks your DNS
Add Sender Address
Create a sender like hello@yourdomain.com
Verify via OTP
Enter the 6-digit code sent to that address
Start Sending
Your verified sender is ready for campaigns
~5 min
platform setup
24–48h
DNS propagation
1 min
sender verification
Before You Begin
You will need three things before starting:
- A Brixus365 account with access to the Settings page. If you are on a team plan, make sure your role has permission to manage email settings.
- A domain you own (e.g.
yourdomain.comor a subdomain likemail.yourdomain.com). We strongly recommend using a subdomain dedicated to marketing email — it isolates your marketing sender reputation from your corporate email. - Access to your DNS registrar (Cloudflare, GoDaddy, Namecheap, Route 53, etc.). You will need to add a few records there.
Step 1: Adding Your Sending Domain
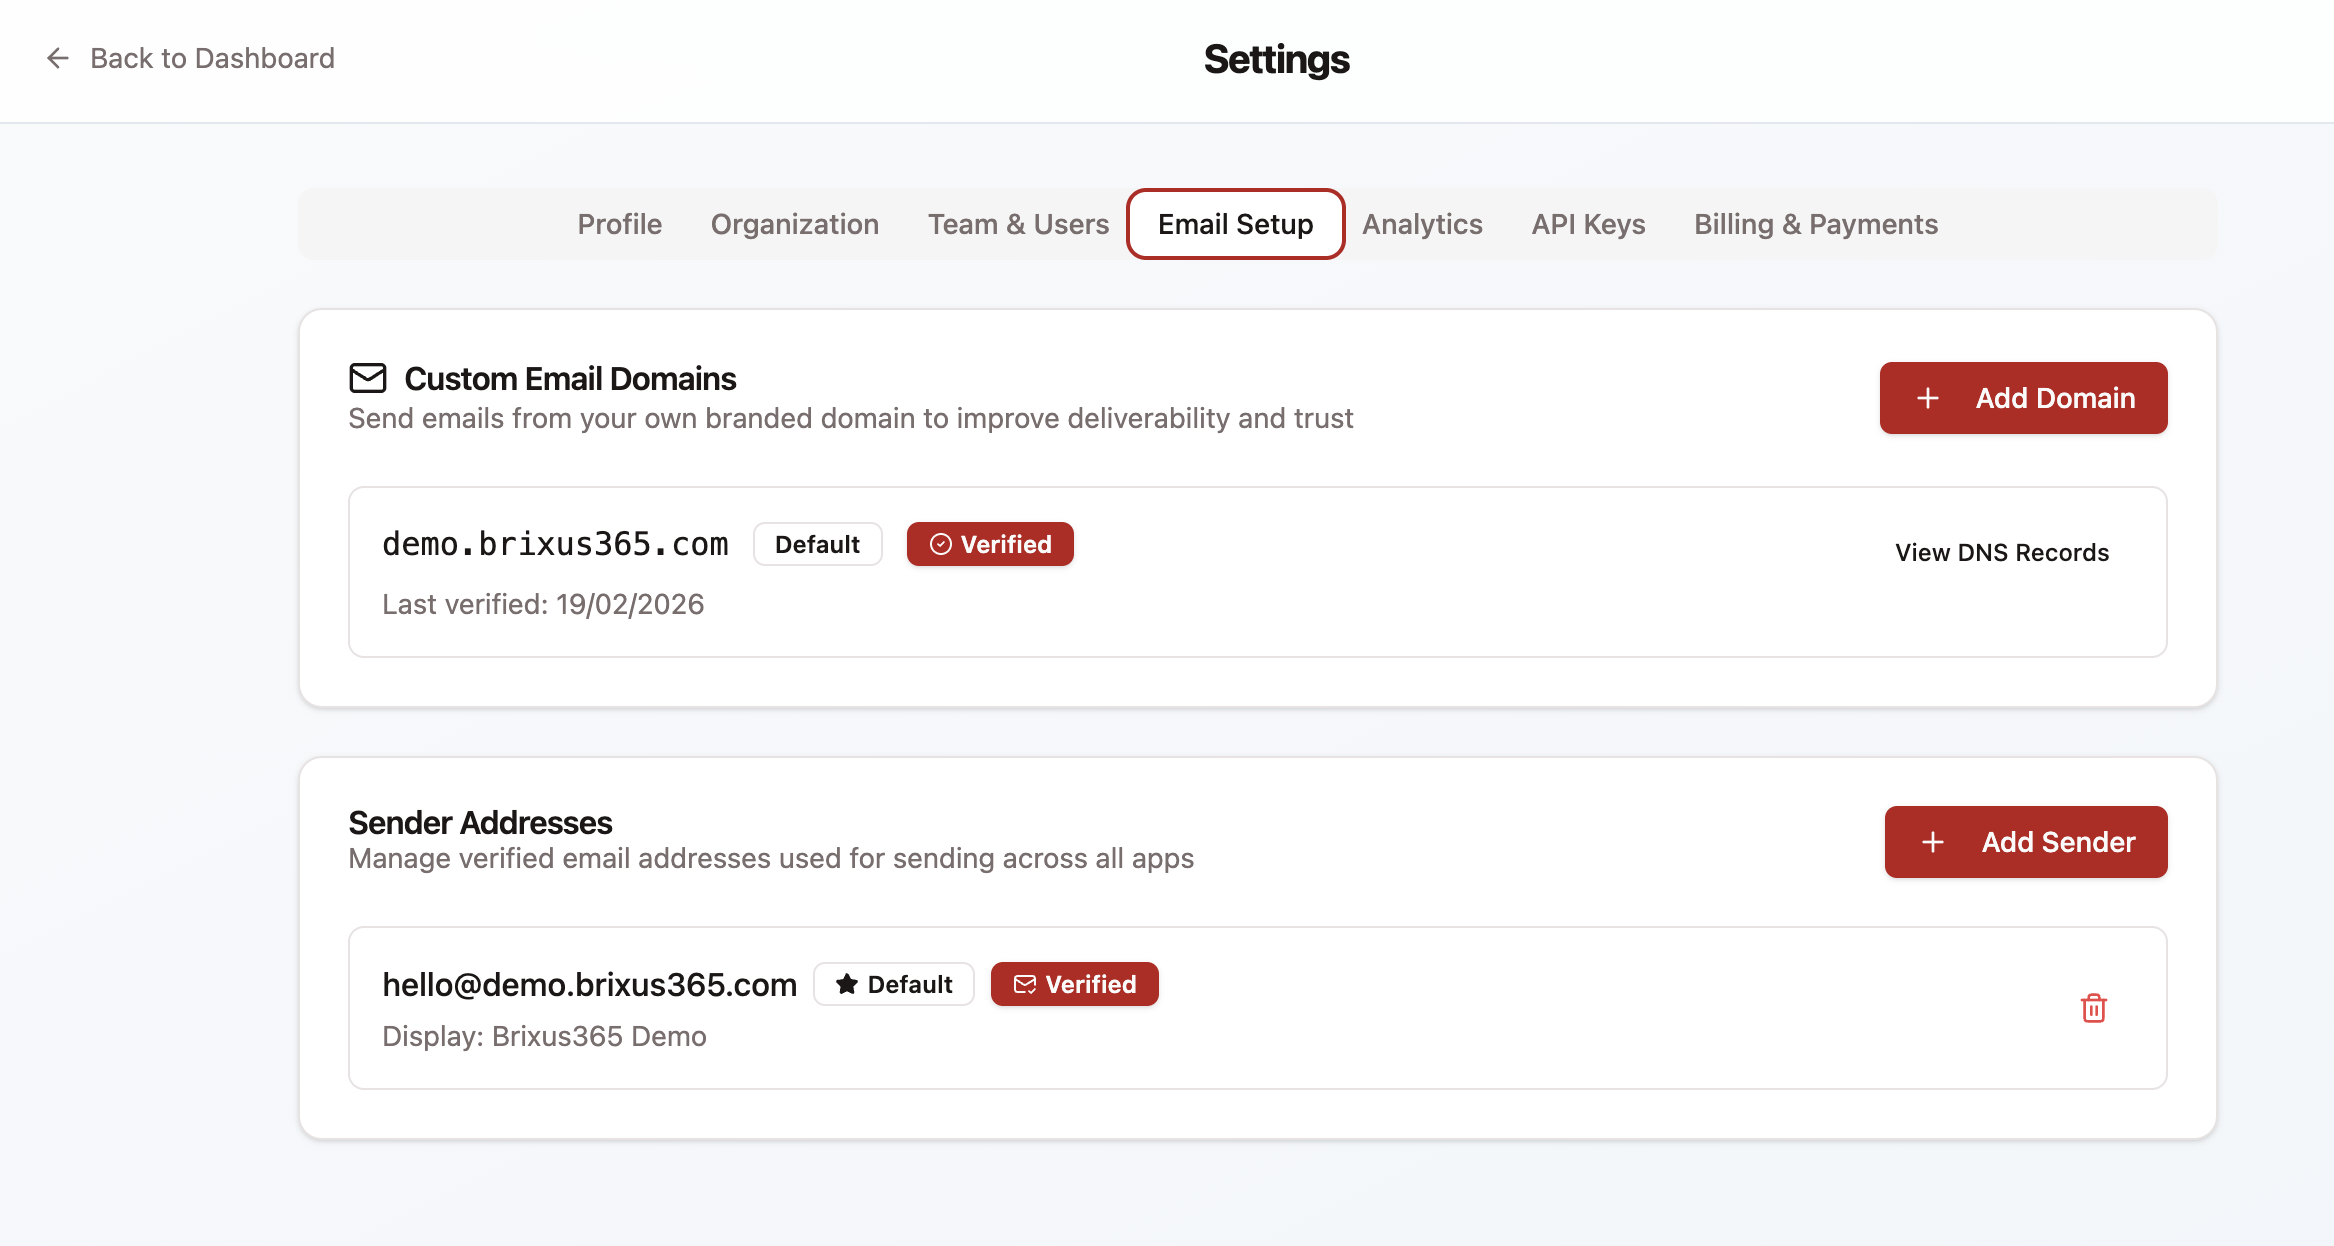
Navigate to Settings, then Email Setup in your Brixus365 dashboard. Under the Domains tab, click “Add Domain”.
Enter your domain name (e.g. mail.yourdomain.com) and optionally check “Set as default sending domain.” Click Add.
Brixus365 will immediately generate all the DNS records you need. You will see them displayed in a table with the exact host name, record type, and value for each one. Every value has a clipboard button — no manual copying required.
Step 2: Configuring DNS Records
This is the most technical step, but Brixus365 does the hard work for you. You just need to copy the records from the dashboard and paste them into your DNS registrar. Here is what you will be adding:
Domain Setup
DNS records you'll need
Brixus365 generates these with copy-to-clipboard buttons after you add your domain.
SPF
Authorises Brixus365 (via AWS SES) to send email on behalf of your domain.
DKIM
3 recordsThree CNAME records that enable cryptographic signing of every outgoing email.
DMARC
Tells receiving servers what to do when SPF or DKIM fails. Also enables aggregate reporting.
SES Verification
Proves domain ownership to AWS SES. Brixus365 fills this in for you automatically.
You don't need to memorise these. Add a domain in Brixus365 and the dashboard renders the exact records — host, type, value — with one-click copy and live verification.
How to add the records
- Open your DNS registrar (Cloudflare, GoDaddy, Namecheap, etc.) in a new tab.
- Navigate to the DNS management page for your domain.
- For each record shown in the Brixus365 dashboard, click the clipboard icon to copy the value, then create a matching record in your registrar.
- Pay close attention to the record type (TXT vs CNAME) and the host/name field. Getting these wrong is the most common source of verification failures.
- Save all records. DNS propagation typically takes 15 minutes to 48 hours depending on your registrar and TTL settings.
Provider-Specific DNS Setup
Quick reference for the most common registrars
- 1Log in to Cloudflare dashboard
- 2Select your domain
- 3Go to DNS > Records
- 4Click "Add record" for each entry
- 5If proxied (orange cloud), switch to DNS only (grey cloud) for CNAME records
Note: Disable the proxy (orange cloud) for DKIM CNAME records — they must be DNS-only.
- 1Go to My Products > your domain
- 2Click DNS > Manage Zones
- 3Click "Add" to create each record
- 4Set TTL to 1 hour (3600)
- 5Save and wait for propagation
Note: GoDaddy can take up to 48 hours for DNS propagation. Be patient before re-verifying.
- 1Go to Domain List > Manage
- 2Click Advanced DNS tab
- 3Click "Add New Record" for each entry
- 4For host field, use @ for root or the subdomain prefix
- 5Automatic TTL is fine
Note: For the SPF TXT record host, use "@" — Namecheap does not require the full domain.
- 1Open Route 53 in AWS Console
- 2Go to Hosted Zones > your domain
- 3Click "Create record" for each entry
- 4Choose Simple routing
- 5Set TTL to 300 seconds
Note: If Brixus365 uses the same AWS account, SES verification may happen automatically.
Using a different registrar? The process is the same — look for a “DNS Management” or “Zone Editor” section and add the records Brixus365 provides.
Step 3: Verifying Your Domain
Once you have added all DNS records at your registrar, go back to Settings, then Email Setup in Brixus365 and click “Verify Domain” next to your domain.
Brixus365 will run DNS queries to check each record. You will see a detailed breakdown of which records passed and which failed:
- DKIM — All 3 CNAME records must resolve correctly.
- SPF — The TXT record must include
amazonses.com. - SES Verification — The verification TXT record must be present.
- DMARC — Recommended but not required for verification to pass. You will see a warning if it is missing, not a failure.
If all required records pass, your domain status changes to Verified and you can proceed to adding sender addresses. If anything fails, the dashboard will tell you exactly which record is wrong or missing.
Step 4: Adding Sender Addresses
With your domain verified, you can now create sender addresses — the “From” addresses your recipients will see. Navigate to the Sender Addresses tab under Email Setup.
Click “Add Sender” and fill in:
- Email address — Must use your verified domain (e.g.
hello@mail.yourdomain.com). - Display name (optional) — What recipients see as the sender name (e.g. “Sarah from Acme”). If blank, only the email address is shown.
After clicking Add, Brixus365 sends a verification email with a 6-digit code to the address you entered. This confirms that the mailbox exists and that you have access to it.
Sender Address Verification
How the OTP-based email verification works
Enter sender email address
e.g. hello@yourdomain.com — the domain must already be verified
Brixus365 sends a 6-digit code
A verification email arrives at the address you entered
Enter your verification code
Code expires in 24 hours
Sender verified!
Ready to use in campaigns — set it as your default sender
6 digits
OTP code length
24 hours
code expiry window
5 max
resends per hour
Setting a default sender
Once verified, you can mark any sender as your default. The default sender is pre-selected whenever you create a new campaign, saving you a click every time. You can always override it per campaign.
You can create as many verified senders as you need — different senders for newsletters, transactional emails, promotional campaigns, and so on.
Best Practices
Getting your domain and senders configured is the foundation. Here are a few practices that will help you maintain strong deliverability from day one:
Use a dedicated sending subdomain
We mentioned this earlier, but it bears repeating. A subdomain like mail.yourdomain.com creates a clean separation between your marketing reputation and your corporate email. If a campaign triggers spam complaints, your company’s day-to-day email remains unaffected.
Set up DMARC reporting
Even though DMARC is listed as “recommended” rather than required, you should absolutely set it up. Start with a p=none policy to monitor without enforcement, then tighten to p=quarantine or p=reject once you are confident in your authentication setup. The rua tag lets you receive aggregate reports about who is sending email using your domain.
Use descriptive display names
Instead of sending from a bare email address, use a display name that builds trust: “Sarah from Acme” performs better than “noreply@mail.acme.com”. A real human name or your brand name tells the recipient who you are before they even read the subject line.
Create purpose-specific senders
Consider separate sender addresses for different types of email:
newsletter@mail.yourdomain.comfor regular contenthello@mail.yourdomain.comfor promotional campaignsupdates@mail.yourdomain.comfor product updates
This gives recipients the ability to filter and organise your emails, and it helps you track engagement by sender address.
Do not use noreply@ addresses
A noreply@ address signals to recipients (and spam filters) that you do not care about two-way communication. Use a real, monitored address that can receive replies. Even if most replies are auto-responders, the ones that are not are valuable feedback from your audience.
Troubleshooting
Most setups complete without issues, but if you hit a snag, here are the most common problems and their solutions:
Troubleshooting Guide
Common issues and how to fix them
Domain stuck on "Pending Verification"
Possible causes
- •DNS records haven't propagated yet (can take up to 48 hours)
- •Records were added to the wrong domain or subdomain
- •Registrar proxy (e.g. Cloudflare orange cloud) is intercepting CNAME lookups
How to fix
- •Wait 24–48 hours, then click "Verify Domain" again
- •Double-check the host/name field — match exactly what Brixus365 shows
- •Switch DKIM CNAME records to "DNS only" mode
DKIM verification fails
Possible causes
- •Only 1 or 2 of the 3 required CNAME records were added
- •Extra spaces or characters in the copied value
- •Record type set to TXT instead of CNAME
How to fix
- •Verify all 3 DKIM records are present in your DNS zone
- •Re-copy the value using the clipboard button in Brixus365
- •Ensure record type is CNAME, not TXT or A
SPF record not detected
Possible causes
- •Multiple TXT records with "v=spf1" — only one SPF record is allowed per domain
- •SPF record is missing the include:amazonses.com directive
- •Record was added as a subdomain instead of the root (@)
How to fix
- •Merge all SPF includes into a single record: v=spf1 include:amazonses.com include:other.com ~all
- •Add the amazonses.com include to your existing SPF record
- •Set the host field to @ (root domain)
OTP verification email not arriving
Possible causes
- •The sender email address domain isn't verified yet
- •Email landed in spam/junk folder
- •Mailbox doesn't exist or is not receiving mail
How to fix
- •Complete domain verification first, then add the sender address
- •Check spam/junk — the email comes from Brixus365 system sender
- •Confirm the email address can receive mail before adding it
OTP code rejected or expired
Possible causes
- •Code has expired (24-hour window)
- •Typed the wrong code or confused with a previous code
- •Resend was triggered, invalidating the old code
How to fix
- •Click "Resend Code" to get a fresh 6-digit code (up to 5 resends per hour)
- •Use only the most recent code from the most recent email
- •If locked out of resends, wait one hour and try again
Frequently Asked Questions
Can I use my root domain instead of a subdomain?
How long does DNS propagation take?
Can I add multiple domains?
What if I already use Google Workspace or another email provider?
How many sender addresses can I create?
Do I need to configure email setup before I can send campaigns?
Verify your sending domain in minutes
Guided DNS setup with SPF, DKIM, and DMARC instructions tailored to your DNS provider.